
Power Indicator - The LED on the machine does not light up when the power button is pressed.
Check that the power supply is connected correctly and that the emergency stop button is on, or restart the machine.
If the status is correct, the diode on the machine should light up and in the program the connection status will be green!
Driver not detected in Device Manager list during first time installation.
Uninstall the existing driver and reinstall it. See the instructions for installing the software and driver appropriate for your operating system version.
After installing the driver, EZCAD still displays a message that the hardware key cannot be found.
Check if the driver has been installed correctly and is visible in the device manager list.
Check if the USB cable is connected properly.
Check if the laser is turned on.
Please check if there is no electromagnetic interference in the area that may cause interference with USB communication.
When I open EZCAD software, I get the message "Cannot open valid file."
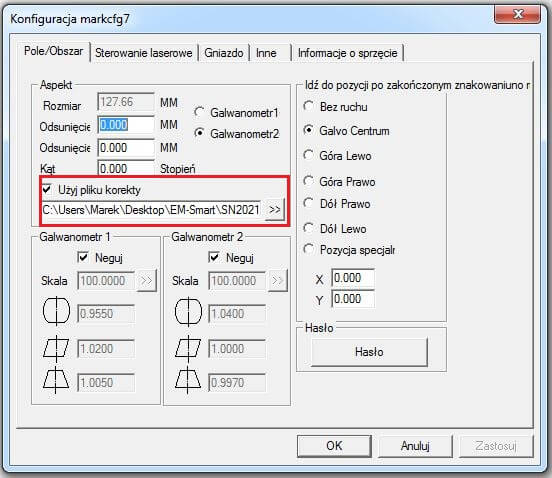
This is because there is no patch file and the “Use correct file” option is checked in the F3 parameter. If there is a patch file, select the correct path; if there is not, you can leave the “Use correct file” option unchecked.
No laser beam
Check if the device is turned on and maintains communication with the program (green marker in the program).
Check if the lens cover is removed.
Check the parameters set in the program.
Verify the focus, if you have set the correct height from the object!
No red indicator light
Use “F3” to check whether the configuration parameters for the port are set or not.
Change the red light indicator if there is still no red light after configuring the parameters.
Check whether the lens cover is removed.
No laser beam or red light from the pointer
Please check if the lens cover is removed.
Check if the EZCAD software is connected and the green indicator in the program is on.
Uneven marking or laser engraving
Check the height of the object to see if it is even. The surface of the object should be parallel to the path of light.
Weak red light
Please clean the galvometer or F-theta lens.
Check if the red light indicator is broken. If so, contact the service for further instructions.
Double red indicators do not overlap
Adjust the small red pointer. Refer to the EZ-Cad manual for instructions on how to adjust the red point settings.
Light path indicator off
Please reattach the arm and reset the port configuration parameters. Power on the machine again.
The selected pattern is deformed.
Change the correction file or re-enter it. Restart EZ-Cad.
„The support arm is tilted, please tighten the screw!”
Tighten the screws so that the arm is vertical to the marking platform.
EZCAD software does not display "Ready" message
Check if the driver or EZCAD program is installed correctly.
Check if the device is installed correctly or if the USB cable is connected correctly.
An edited drawing in ezcad cannot be saved as a file.
The marking machine must be connected to the computer and must be turned on.
Red light does not line up with laser
“F3”-“Other”-“Red Light Indicator””
Adjust the XY red light offset position and XY proportional size according to the red light and laser overlap in the previous step, and verify until it is adjusted correctly to achieve the red light and laser overlap effect.
Laser marker marks very slowly even after adjusting the speed on the right side of the software.
Try changing the fill type and line spacing.
EZCAD software shows “Ready” and the red light is on, but the machine does not mark or engrave.
Adjust the power on the right side of the software.
Check that the height of the marked object relative to the head is set correctly.
The machine does not engrave
First, please check if the lens cover has been removed, then check if the height (focus) has been increased.
If the problem persists, try changing the parameter settings in the program (slower run, higher power and higher frequency.)
If the problem persists, contact your supplier.
Remember that some materials are not suitable for engraving and this is not due to machine errors.
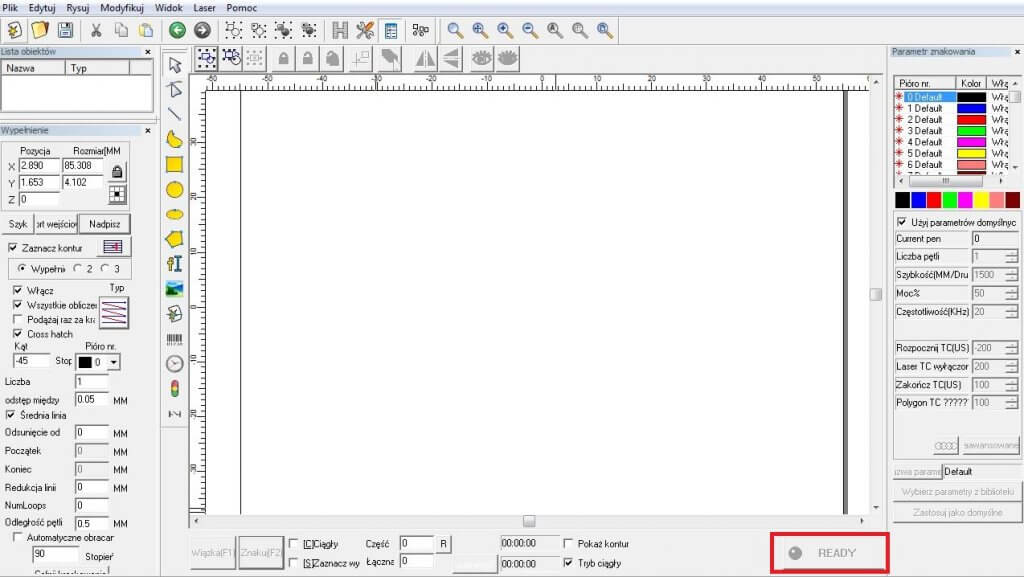
Engraving type cannot be changed
To change the fill settings, first select the object on the work area that you want to edit, then make changes in the “Fill” window located on the left side of the screen.
In the aforementioned window, you can add/remove the contour, change the fill type or the distance between the fill grid. After making changes, click the “Overwrite” button located under the size editing field.
To return to the previous settings, click the back button located under the menu bar or use the Ctrl+Z keyboard combination.

Will the laser engrave on wood or veneer?
Yes, the laser will mark on the coated material, which may be wood, veneer or other material.
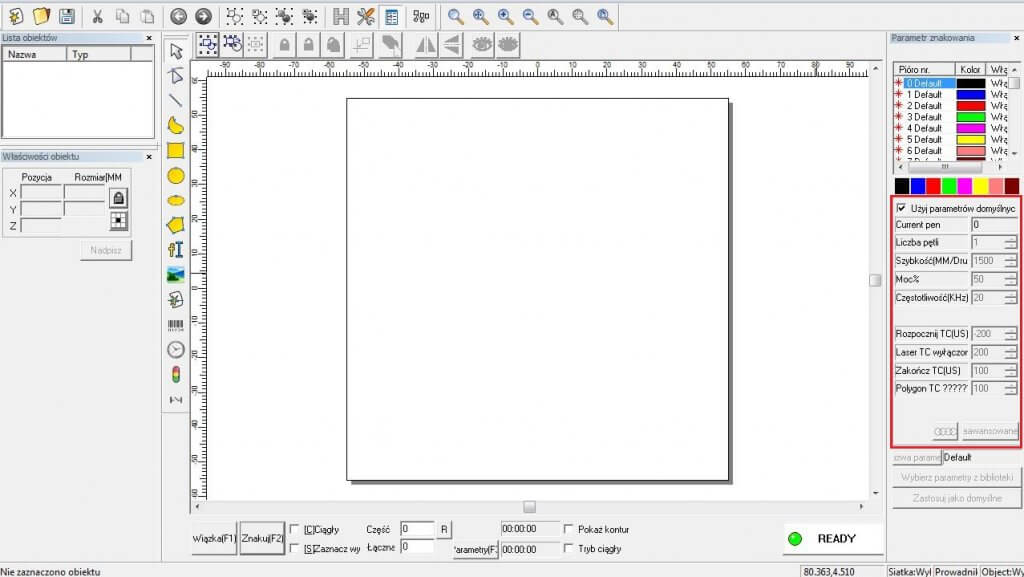
The “Ready” indicator light is on in the program
If the icon is completely missing, the program probably started in demo mode. You should restart the program after switching on the machine.
When the indicator light is on and glows red, check if you have correctly added the file with the serial number to the machine.
In the next step, move the machine arm using the knob located on its back. If the problem persists, reinstall the software.
What is the lifetime of the laser source?
Our laser is equipped with a Raycus source, and thanks to this, the module’s lifespan is 100,000 hours (about 10 years of uninterrupted work!). So you don’t have to worry about the device’s lifespan.